Sweet Potato and Black Bean Enchilada Stack

It’s time to share with you another fabulous meatless main dish that my family loves.  It combines several ingredients that don’t seem to go together: sweet potatoes, salsa verde, cream cheese, and black beans, but actually they combine to form this wonderful enchilada casserole in stacked form.  It’s an adaptation of one I found at Greens and Chocolate.
Sweet Potato and Black Bean Enchilada Stack

Ingredients:
1 can black beans, drained and rinsed
1 large clove garlic, grated
2 cups cooked sweet potatoes, mashed (2 medium)
½ tsp cumin
1 tsp chili powder
¾ tsp salt
1 cup salsa verde or tomatillo salsa
3 (9”) flour tortillas 
6 oz. cream cheese, softened
1 cup shredded Monterey Jack cheese

Directions:
Preheat oven to 350°. 

In large bowl, combine the beans, garlic, sweet potato, cumin, chili powder, and salt.  Set aside.

To assemble the casserole, coat the bottom of a 9″ round casserole dish or cake pan with ¼ cup of the salsa verde.  Spread ⅓ of cream cheese onto each tortilla.  Place one of the tortillas on top of the sauce.  Top with ⅓ of the sweet potato filling and top with another ¼ cup of the salsa verde.  Repeat to make three layers and top with cheese.  Bake for 30 minutes.  Cut into slices and enjoy!

Makes 4-6 servings.
Here are a few pics of the process.


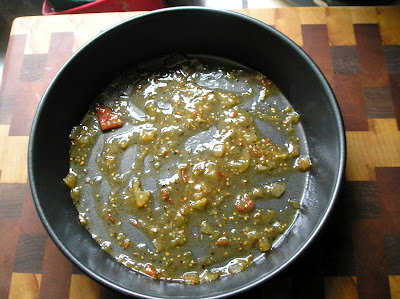
Bottom: salsa verde, aka tomatillo salsa.  I use the Meijer Gold brand.

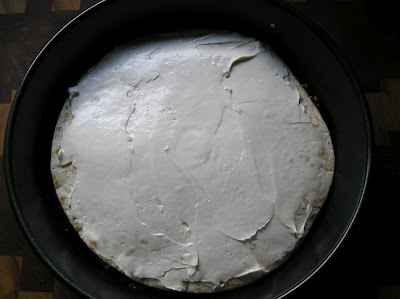
 Cream cheese.  This kind of holds everything together and brings a nice creaminess to the dish.
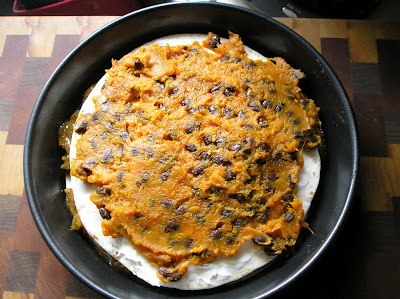
 Sweet potato and black bean mixture.
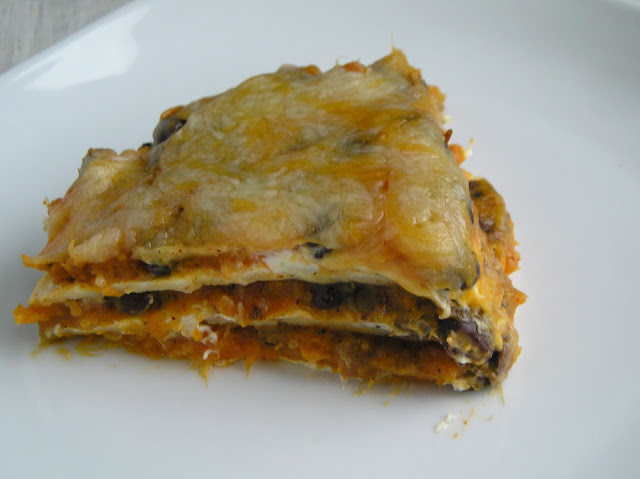
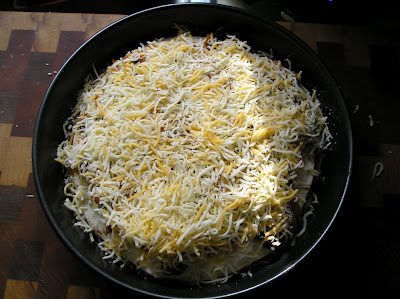
 Topped with cheese, of course!  My favorite is the Kraft Mexican blend.
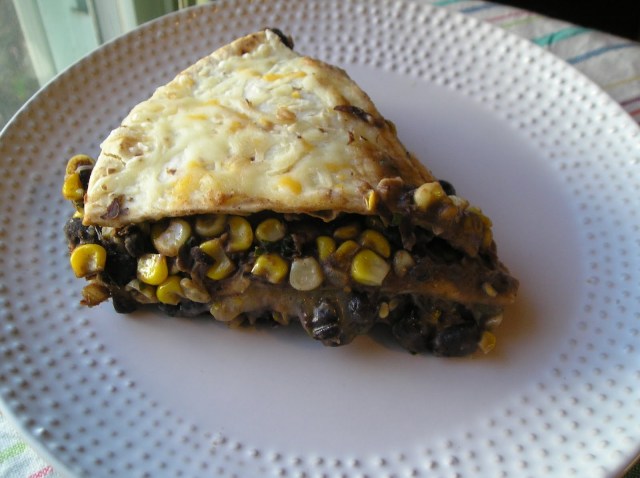
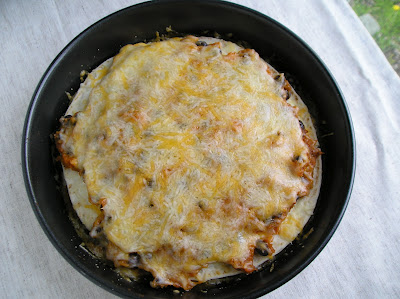
 Isn’t it pretty?
This dish is a huge hit with my family.  I love it because it contains ingredients that I almost always have on hand at any given time.  It’s very filling and nobody misses the meat when I serve this.


Shared at:

Eating The Alphabet: Herbed Goat Cheese Edamame Dip

I have joined a new monthly blog challenge.  Yes, another one!  This brings me to four.  They are just so much fun.  I hated  homework in school, but when it comes to food blogging, having “assignments” really makes things interesting.  This new (to me) challenge is a lot fun and I think you will really enjoy it.

It’s called “Eating the Alphabet” and it’s hosted by Brenda at Meal Planning Magic.  Each month the participants are assigned two letters of the alphabet and are challenged to make and post a new recipe using a fruit, vegetable, grain, bean, or legume that starts with one of the assigned letters.  The whole point is to encourage the eating of healthy foods.  Considering how many recipes I have on my blog, not very many of them are vegetable recipes, so I thought this would be a good way to branch out and increase my vegetable repertoire.

I missed the first two months, so this month the assigned letters are E or F.  What a month to begin!  There aren’t too many options with those letters.  Brenda really encourages choosing foods that are in season, and trying food that are out of your comfort zone.  I found out that fava beans are in season in the spring, and since I had never cooked with them before, I thought they would be the perfect choice.  I called around to a few area grocery stores and none of them had fava beans in stock, but one, Meijer, offered to order them for me.  Great!  Meijer really does have a superb produce section with great variety.  When I went to pick them up, I was informed that they tried to order them, but they weren’t available.  😦  Bummer!  Then I got to thinking that edamame is similar to fava beans and those are available year-round in the freezer section.  I have cooked with edamame before, but it’s been a while.  So I switched gears a little bit and got into an edamame state of mind.

I found a recipe for an edamame dip with goat cheese.  I had tried an edamame dip a few years ago and failed, so I was kind of eager to try it again.  And I had never cooked with goat cheese before, so that was interesting to me.  This dip recipe originally comes from Food and Wine magazine.  I changed it a bit; here’s my version.

Herbed Goat Cheese Edamame Dip


Ingredients:
1½ lbs. shelled edamame, thawed if frozen
4-5 oz. herbed goat cheese, crumbled
½ cup sour cream
2 tbsp fresh lemon juice
1 small clove garlic, grated
¾ tsp salt
1 tbsp dill, chopped
Pita chips


Directions:
In a large pot of boiling salted water, boil the edamame until very tender, about 15 minutes. Drain well and transfer to a food processor. Add the goat cheese, sour cream, lemon juice, garlic, and salt and puree until smooth, scraping down the sides of the bowl. Stir in the dill and transfer the dip to a serving bowl. Cover with plastic wrap and refrigerate for at least 1 hour or overnight.


Serve the dip chilled or at room temperature with the pita chips.


Makes 4-5 cups.

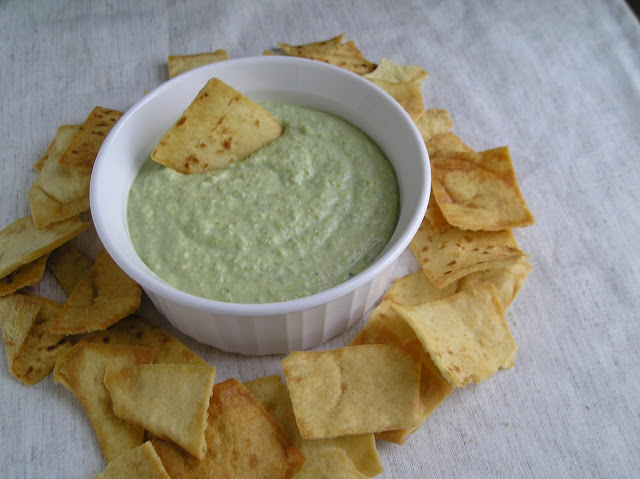
It turned out really well.  The original recipe said to boil the edamame for 8 minutes, but the problem I had the last time I tried an edamame dip was that it didn’t get soft enough and instead of forming a puree, it just got chopped up into little pieces.  So this time I really boiled the heck out of it!  I put 15 minutes in the recipe, but I probably did mine longer than that; I forgot to time it.  I boiled it until it mashed well with a fork.  The original recipe also called for chipotles in adobo, but that didn’t sound like it went well with the other ingredients, and I didn’t really want a spicy dip, so I left that out.  I also decreased the sour cream and cut back on the lemon just a tad.  Oh, and the recipe called for 2 tsp of salt.  That’s a lot!  I started with just one, and it was a teeny bit on the salty side, so next time I will only do ¾ tsp.  The recipe also called for spiced pepitas to go on top, but I couldn’t find pepitas so I just left them off.

I don’t have a full-sized food processor, just a little 3 cup one, so my method was a little bit different.  I pureed the edamame by itself in batches, then combined it with all of the other ingredients in a bowl.  I had trouble pureeing the edamame by itself; it’s a little dry for that, so I added a little bit of water to each batch.  That probably made the finished dip a little looser than it was meant to be, but that’s why I cut back on the sour cream.  So in the end it probably evened out.

I really like this dip.  The herbed goat cheese flavor is really good combined with the vegetal flavor of the edamame.  And it’s really quite filling!  I had some with my lunch and ended up really not having any desire to eat when dinnertime came around.  I had it at room temperature and then later tried it cold and I liked it both ways.  I ate it with pita chips, but it would be good on crackers, or even with veggie sticks as a crudité.

This recipe makes a lot, I totally should have halved it.  Anybody want to come help me eat it?


Baked Chili Bean & Cheese Enchiladas

(Sorry about the quality of the pictures in this post. It was raining the evening I made this and there was not much light to work with!)
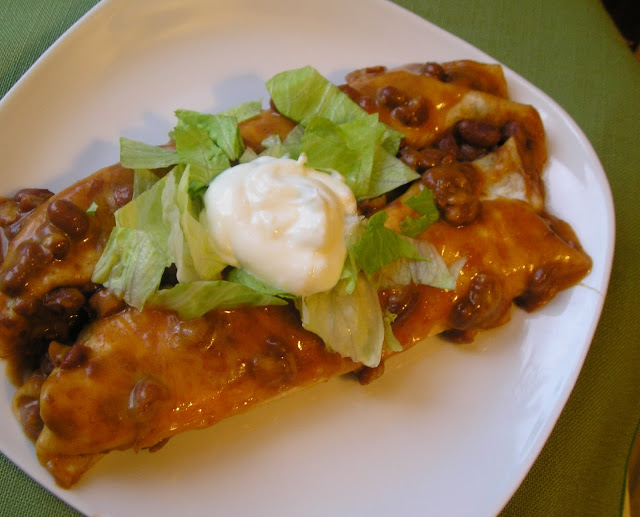
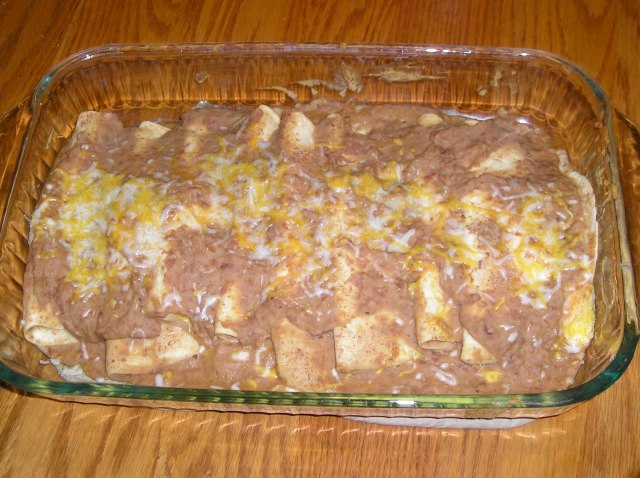
This is the newest addition to my meatless main dish rotation.  I’m tagging it as Mexican, though it’s more accurately Tex-Mex.  Chili beans (also called ranch beans) are combined with cheese and rolled into tortillas and baked.  It’s an adaptation of one I saw at Simple Daily Recipes.
Baked Chili Bean & Cheese Enchiladas

Ingredients:
4 (16 oz.) cans pinto beans in chili sauce
8 (10”) flour tortillas
2 cups cheddar cheese, shredded
Lettuce, for topping
Sour cream, for topping

Directions:
Preheat oven to 350º.

Pour the beans with their liquid into a large bowl.  Lightly mash, leaving about half of the beans whole.  Stir in 1½ cups cheese.  

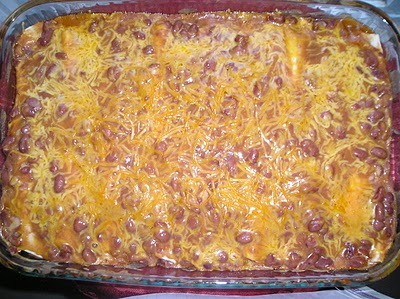
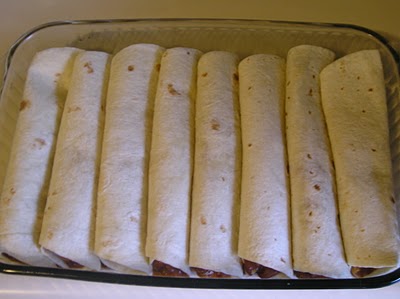
Spread a little bit of the bean mixture evenly in the bottom of a 9×13” casserole dish.  Fill each tortilla with a generous amount of bean mixture.  Roll tortillas up and place seam side down in casserole dish.  Use remaining bean mixture to spread over the tops of the burritos.  Cover all the enchiladas with the remaining cheese.

Cover and bake 25 to 30 minutes . Allow to cool at least 5 minutes before serving.  Serve with lettuce and sour cream.

Makes 6-8 servings.
Mmm, this is good!  It’s a nice change from our usual Mexican dishes.  I got the medium beans, which was the perfect level of heat for us.  If you like things hot, get the hot beans.  How can you go wrong with beans and cheese?

 Just look at all that beany cheesy goodness!
I just barely fit 8 tortillas in my pan.  They were as snug as bugs in rugs!

I wasn’t sure what to put as far as how many servings this makes.  I could only eat one, but I could see how someone could maybe eat one and a half, so I left it at 6-8.  Beans are pretty filling.

They definitely require some toppings to offset the richness.  I chose lettuce and sour cream.  The lettuce provided a nice crunch to change up the texture, and the sour cream provided the coolness.  I ate some of the leftovers with tortilla chips; that was really good too.

Don’t forget to check out my giveaway for up to 4 chances to win a one-year subscription to Taste of Home magazine!  The contest ends Tuesday morning, so head over there now and make your entries!


Pin It

Falafel Pita Sandwiches

This is another one of my meatless main dishes.  Falafel is a Middle Eastern dish that consists of fried balls or patties made of ground chickpeas.  You might remember it being mentioned in the move Slumdog Millionaire, as it is popular street food in that part of the world.  It also makes a wonderful meatless main!

Traditional falafel is deep-fried, but that’s one thing I don’t do, so I just pan fry mine.  You can also bake them, but I haven’t tried that yet.  Here’s how I make mine.

Falafel Pita Sandwiches


Ingredients:
2 (15 oz) cans garbanzo beans, drained
½ small onion, grated
2 cloves garlic, grated
¼ cup fresh cilantro, chopped
1 tsp lemon juice
2 tsp olive oil
2 tsp coriander
2 tsp cumin
¼ tsp red pepper flakes
¼ cup flour
Vegetable oil, for frying
Pita pockets
Hummus
Fresh spinach


Directions:
Put beans in a medium sized bowl and mash with a fork (or pulse in food processor).  Add onion, garlic, cilantro, lemon juice, olive oil, coriander, cumin, red pepper flakes, and flour and mix well.


Form into small balls, about 1½” in diameter and slightly flatten. 


Heat oil in large skillet.  Fry falafel a few minutes on each side, until golden brown.  Drain on paper towels.


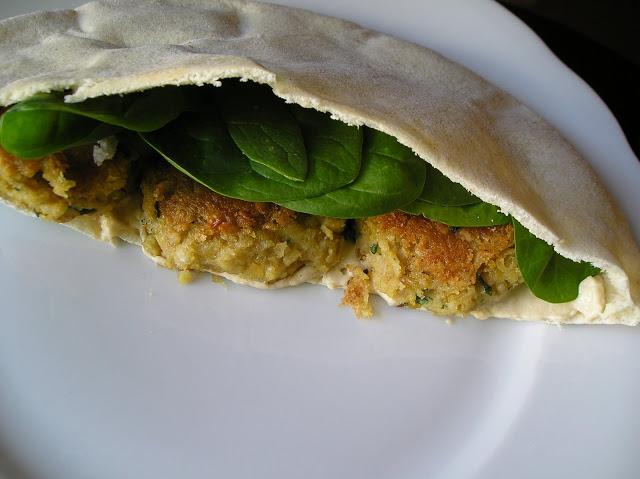
Stuff in pita pockets with hummus and spinach.


Makes 4 servings.

This is really good.  You can make your own hummus, of course, but I don’t have a full-sized food processor and my mini chopper can only do so much that it’s easier for me just to buy it at the store.  And Meijer had it on sale buy one get one free yesterday! 🙂  It may seem weird to serve chickpea balls with a chickpea puree, but the flavors and consistencies are so different that it totally works.
Kids love this dish.  It’s so fun for them to stuff the little balls inside the pita.  And my daughter loves the spinach, which she calls “leaves”.  This is definitely one of Jim’s favorites in our meatless mains rotation.
As an alternative to serving these as listed above, I have also thought of making them into large patties and serving them on hamburger buns, kind of like a “falafel burger”. 

Slow Cooker Ham and Beans

This is one of my favorite comfort food meals. And it’s also my favorite way to use leftover Easter ham. This recipe comes from my mom.
Slow Cooker Ham and Beans

Ingredients:
1½ cups dry great northern beans
2 cups diced ham
5 cups water
2 tsp salt
¼ onion, finely minced

Directions:
Place beans and ham in slow cooker. Add water, salt, and onion.

Cook on low for 8 hours. Serve over warm cornbread.

Makes 6 servings.
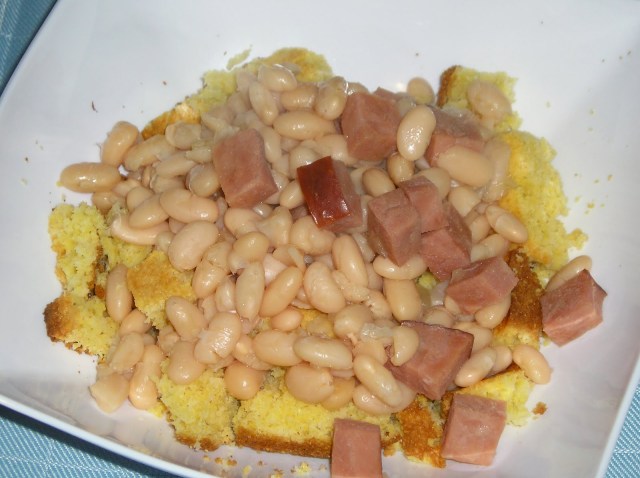
It doesn’t get much simpler than that. I love the flavor of the salty ham and beans together with the sweet cornbread. And the beans come out so perfectly using the slow cooker; all soft and creamy. Mmm!
Using the amount of water listed above, you will end up with some liquid still covering the beans when it’s done. I like it that way because I drizzle a little bit of it over my cornbread so it’s not dry. If you like it drier, you can cut back on the amount of water.
I took the picture above the last time I made this and since I didn’t have leftover Easter ham, I just used a chunk of ham from the store. I like the look of the rustic bits of smoked ham instead of the cubes. I may have to take another picture of the batch I made yesterday.

Black Bean Tortilla Pie

This is one of our favorite meatless main dishes. I got it from Taste of Home.

Black Bean Tortilla Pie

Ingredients
½ medium onion, chopped
2 tsp ground cumin
1 tbsp olive oil
3 garlic cloves, minced
2 cans (15 oz. each) black beans, drained and rinsed
2 cups vegetable broth
2 cups frozen corn, thawed
¼ cup cilantro, finely chopped
4 flour tortillas (8”)
1 cup (4 oz.) shredded cheese, divided
Sour cream
Salsa

Directions:
Preheat oven to 400°.

In a large skillet, saute the onion and cumin in oil until onions are tender. Add garlic; cook 1 minute longer. Add beans and broth. Bring to a boil; cook until liquid is reduced to about ⅓ cup. Mash beans if desired. Stir in corn and cilantro; remove from the heat. Check for seasoning, adding salt if necessary (this will depend on the broth you use).

Place one tortilla in a 9” deep dish pie plate coated with cooking spray. Layer with 1½ cups bean mixture and ¼ cup cheese. Repeat layers twice. Top with remaining tortilla.

Bake, uncovered, for 15-20 minutes or until heated through. Sprinkle with remaining cheese. Bake another 3 minutes or until cheese is melted. Cut into wedges. Serve with sour cream and salsa.

Makes 6 servings.
This is really good and really pretty easy to make. I changed it up just a little from the original. The original called for half the amount of cumin, green peppers, green onions, and no cilantro. I left out the green peppers because we don’t like them and the green onions because they just seemed redundant with the white onions. The cilantro was my addition; I love the stuff and it really makes the dish for me. And it looks really pretty with flecks of green in it. It was also supposed to be baked in a springform pan, but I don’t have one. If you use a pie plate like I do, make sure it is the deep dish kind as it probably won’t fit in a regular one.
A note on the tortillas: Apparently the brand of tortilla you use makes a difference. The first time I made this I used the Meijer brand. They were slightly larger than my pie plate, so I had to trim them to fit. But the finished pie sliced up very nicely. The second time I made it, I used Mission brand tortillas since they started selling them at my Sam’s Club. I was pleasantly surprised to find that they were the perfect size with no need to trim. But then they gave me great difficulty when I went to slice up the pie. They didn’t cut well at all. I think I will use the Meijer ones in the future. So you might have to play around with the brand of tortillas you use here.
My husband loves this dish and said that he didn’t even realize it was meatless until he was halfway through it. And even then he didn’t mind a bit.

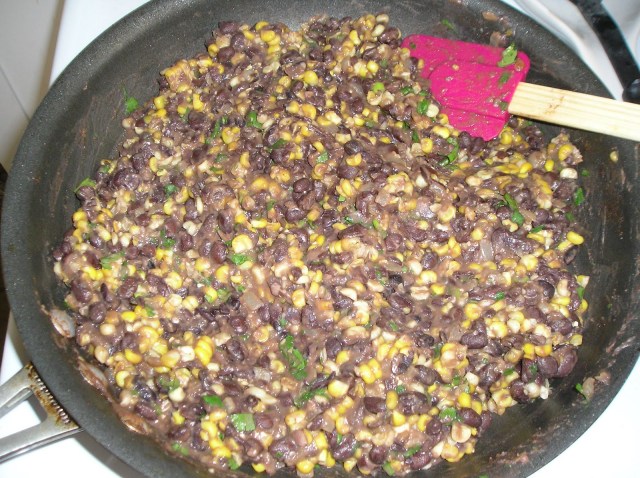
The filling. It’s so colorful and pretty!

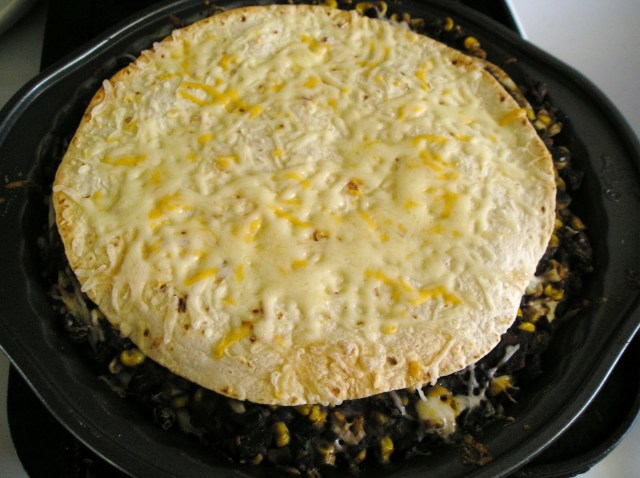
The finished pie before slicing.

Country-Style Baked Lima Beans

I got this recipe from Cooking Light Magazine.
Country-Style Baked Lima Beans

Ingredients:
2 cups dried lima beans
3 bacon slices, chopped
1 cup onion, chopped
1 cup carrot, finely chopped (1 large)
2 cups water
2 tbsp butter, softened
1 tsp salt

Directions:
Sort and wash beans; place in a large Dutch oven. Cover with water to 2” above beans; cover and let stand 8 hours or overnight. Drain the beans. Set aside.

Preheat oven to 300°.

Cook bacon in a large nonstick skillet over medium heat until crisp. Remove bacon from pan with a slotted spoon; set aside. Add onion and carrot to drippings in pan; sauté 5 minutes or until golden. Add beans, bacon, 2 cups water, butter, and salt; stir well.

Cover and bake for 2½ hours or until beans are tender, stirring every hour.

Makes 8 cups.

Nutrition Information:
Calories: 248
Fat: 7g (Sat 3g)
Cholesterol: 13mg
Carbohydrates: 35g
Sodium: 404mg
Protein: 12g
Fiber: 11g
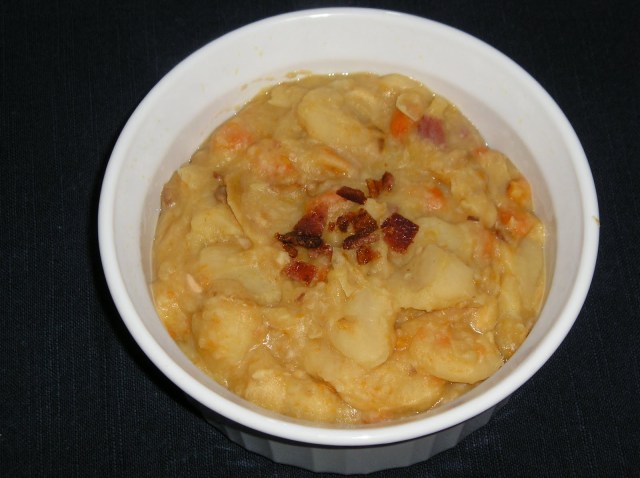
This was really good. I don’t have too much to say about it because I didn’t really change anything about the recipe. It’s really good the way it is.
The only bad thing about it is that you really have to plan out when you are going to make it. I forgot about soaking the beans until about 8:30 am the day I had planned to have them for supper. I went ahead and soaked them, but then I forgot about them again until 4:00 in the afternoon. I didn’t have time to cook the bacon and sauté the onion and carrot and then cook the whole thing for 2½ hours. So I drained the beans, placed them in a Ziploc bag, and stashed them in the fridge. I made them the next day. And that turned out fine, except I think they didn’t need the whole 2½ hours to cook. I probably could have taken them out at 2 hours. So check them at 2 hours to see if they need more time.

Enfrijoladas (Tortilla, Bean, and Cheese Casserole)

This is a recipe I saw on Mexican Made Easy on the Food Network. I’ve never made anything like it before. It’s kind of like cheese quesadillas that are dipped in a homemade bean sauce and then baked in the oven. It’s all kinds of good!
Enfrijoladas

Ingredients:
1 tbsp olive oil
¾ cup chopped onion
1 medium chipotle chile, seeded and minced
2 garlic cloves, minced
½ tsp dried oregano
Salt and freshly ground black pepper
2 cans pinto beans, drained and rinsed
2 cups chicken broth
8 flour tortillas (taco size)
2 cups shredded Manchego or Monterrey Jack cheese
Sour cream, lettuce, tomatoes (optional)

Directions:
Preheat the oven to 350°.

In a saute pan, heat the olive oil over medium-high heat. Add the onion, chile, and garlic. Saute until the onion is soft, about 5 minutes. Rub the oregano, between palms of your hands and sprinkle over the beans. Add salt and pepper, to taste. Add the beans and broth to the pan and simmer for 10 minutes. Cool the beans for about 5 minutes before putting them in the blender. Carefully, pour the mixture into a blender and puree. Return the pureed mixture to the pan and gently reheat over medium-low heat, stirring frequently.

Using tongs, pass the tortillas one by one through the refried bean sauce until they are somewhat softened and coated on both sides with the sauce. Place in a 9×13” baking dish. Fill each tortilla with ¼ cup of shredded cheese. Fold in half and arrange them, overlapping, in the dish. Top with the rest of the bean sauce, just to cover the beans but allow the edges of the folded tortillas to show. Bake 10 minutes, top with additional cheese, and bake another 5 minutes.

Serve with sour cream, lettuce, and tomatoes if desired.

Makes 4 servings.
This was a nice change from the usual Mexican dishes I have done before. The bean sauce is really easy to put together and is way more flavorful than using canned refried beans. Just make sure that the beans have cooled a bit before blending or you will have a mess on your hands.
The original recipe called for placing the tortillas on a plate after dipping in the bean sauce, then filling with cheese, and then placing in the baking dish. That seemed like an unnecessary step and my tortillas were kind of fragile after dipping in the beans, so I just filled them in the baking dish, then folded them over. It was really easy that way.
The lettuce and tomatoes weren’t part of the original recipe, but Jim thought they needed some additional texture, something crunchy. He actually crunched up some tortilla chips to put on top of his. I actually liked it the way it was. I served it with Sweet Corn Tomalito. The combination of spicy and slightly sweet is always good.
The way it’s written above, it is just a tiny bit spicy. If you like things really spicy, increase the number of chipotles you put in the bean sauce.
I will definitely be making this again. We love Mexican and I will be adding this to my ever-growing list of favorite Mexican dishes.

Roasted Chickpeas

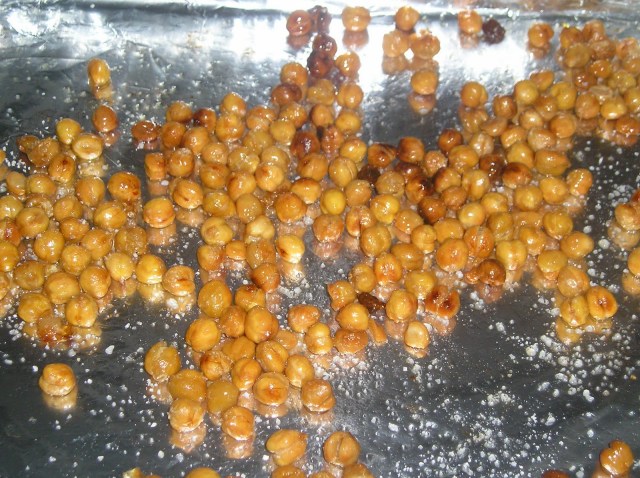
This is something I saw on a blog a while back and headed right to the kitchen to make! Super easy snack.
Roasted Chickpeas

Ingredients:
1 can chickpeas (aka garbanzo beans)
Olive oil
Salt

Directions:
Preheat oven to 425°.

Drain and rinse chickpeas. Spread out on a kitchen towel and pat dry. Place chickpeas on a baking sheet, drizzle with oil, and sprinkle with salt.

Bake about 40 minutes, stirring once or twice.

Makes 4 servings (as a snack).
Not much to say about it, except make sure they are really dry before drizzling the oil on them. They won’t get crispy if they aren’t completely dry.
Oh, and you can add any kind of spices to these to make them a little more interesting (although they are pretty darn tasty on their own!). I saw a recipe for roasted chickpeas with Moroccan spices that sounds pretty good. Maybe I’ll try that next time.
Apparently they sell these as street food in Mediterranean countries.
And even though I put 4 servings, Jim and I ate nearly one whole can by ourselves. 🙂
Enjoy!

Slow Cooker Bean Soup

A month or so ago, Meijer had all of their dry beans on sale. I had been wanting to make a bean soup sometime, so I stocked up. I wanted to do it in the slow cooker, as I love using it, but have only a few meals that I make in it. I looked at some recipes online, but there were too many, and I couldn’t decide on one that I wanted to try. Some of them weren’t slow cooker recipes, so I had to figure out how to adapt them. And almost all of them (even the slow cooker ones) called for soaking the beans overnight before cooking them. Well, that seemed like a pain. So, I put off making the soup because I wasn’t sure how to proceed. Well, today I just decided I was going to wing it. I didn’t soak the beans at all, so I wasn’t sure how long it was going to take, but it turned out really great. I have to say, it was a complete success. Here’s the recipe I created:

Lesa’s Slow Cooker Bean Soup

Ingredients:
2 lbs. smoked ham shanks
1 cup dry pinto beans
½ cup dry black-eyed peas
½ cup dry large lima beans
½ cup dry red kidney beans
½ cup dry navy/great northern beans
½ tsp salt
10 cups water, divided
¼ cup dry lentils
¼ cup dry split green peas

Directions:
Place ham shanks in large slow cooker (at least 6 qt.) Pour beans over ham. Cover with salt and 6 cups of water. Cook on high, about 3 hours. Check water level. Add more water to again cover the beans and ham, about 4 cups. Cook on low, another 3 hours. Take out ham shanks and separate the meat from the bone and fat. Cut or shred meat and return to slow cooker. Add lentils and peas and cook for another 30 to 60 minutes, or until they are soft.

Makes about 8 servings.

Nutrition Info per serving:

Calories: 155
Fat/Sat. Fat: 2/.5
Cholesterol: 8
Sodium: 315
Fiber: 21
Protein: 16

It turned out really well! I started it at 11:30 and it was done by 5:30. We had church, and couldn’t eat it until 8:30, so some of the beans were a little on the soft side, but now that I know how long it takes, I can plan it out better. Jim absolutely loved it. That’s how I measure my success!

Some notes:
1. The recipe says to cook on high for three hours, then low for three hours. That my be hard to do for those of you who work all day and don’t have a programmable slow cooker. I think it would work just as well to cook on low for a longer period of time. Maybe low for a total of 8 hours? I will try this next time. The reason I put it on high was because I didn’t get around to putting it together until 11:30. And since I didn’t know how long dry beans would take, I thought I better start off with high. So next time, I will allow 8 hours and start it on low. If you are going to leave it all day, you better add as much water as you physically can at the beginning so they don’t dry out by the time you get home.

2. I made it today with black beans, but excluded them from the recipe because they made the whole soup kind of black-tinted. The broth was almost black. It doesn’t affect the flavor, it’s just kind of weird looking. It makes everything the same color, and you can’t even tell the different kinds of beans apart. I had that problem with the taco soup once when I forgot to rinse the canned black beans before I added them. I think I will look for another type of bean to replace it, but for now I will just skip them.

3. Next time I would like to add some onions. I have to be careful, because Jim doesn’t like them too much, but if I add them at the beginning, they will be all soft and sweet by the time it’s done. I think they would be a great addition. I might add some very finely chopped garlic as well.

4. I am thinking about adding the lima beans part way through cooking next time. They cooked the fastest, which surprises me because they are the biggest bean. By the time we ate it, the skins of the limas had all come off and were floating around. I think next time I will wait maybe 2 hours and then add them. I’ll let you know how it turns out.

Sorry that I don’t have a pic to show you. My camera is giving me problems. Hopefully I’ll be able to get one the next time I make it.

Want to know the greatest thing about this meal? It’s super cheap! I figured it up and guess how much it costs per serving? Less than 70 cents! Can you believe that? It’s really filling too.

I think I found myself a winner. I hope you try it. Leave a comment and tell me what you think if you do try it.